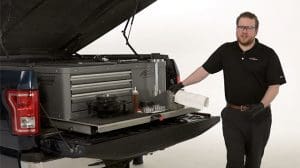
Follow this installation procedure and experience the safety, performance and confidence of having the Trifecta Pre-Adjusted Hub Assembly on your truck. By combining premiere STEMCO wheel end technologies with the trusted Webb® hub in a single, pre-adjusted assembly, installation is faster and more secure. Plus, there is no need to purchase, install, and adjust separate wheel end components and fasteners.
The purpose of this tech tip is to inform customers of the proper installation methods for the STEMCO Trifecta. We will be referencing the following STEMCO PDFs:
- STEMCO Trifecta Pre-Adjusted Hub Assembly Installation Instructions
- Trifecta Brochure
- STEMCO-TQM-Catalog
TOOLS REQUIRED FOR INSTALLATION
- Calibrated torque wrench capable of 250 ft./lbs.
- Sockets for all applications
- Towel and/or emery cloth to clean spindle
- Cleaning solvent or brake clean
STEP 1
Begin by removing all burrs, rust, and contamination from spindle shoulder area. Spindle wheel seal shoulder needs to be cleaned back at least 3/4″ so the new seal can properly be seated. Clean shoulder, bearing journals, threads, and keyway with solvent. Dry with clean cloth.
STEP 2
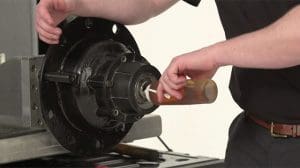
Apply a light coat of lubricant (the same lubricant that will be used in hub) to the bearing journals on the spindle.
The Discover® XR seal includes Stemco’s patented GlideLock™ technology, eliminating
the requirement for seal ID pre-lubrication.
STEP 3
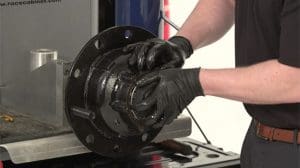
Lifting the hub, align the Trifecta hub onto spindle, (take precaution so the wheel seal is NOT bumped on the spindle end). Engage Zip-Torq® tang or D-Flat with axle keyway, and slide the hub onto the spindle.
STEP 4
Rotate the hub clockwise to engage the Zip-Torq axle fastener and continue rotating manually until it stops. A clicking sound will be heard while rotating the hub; this means the Zip-Torq nut is working correctly.
STEP 5
Unscrew and remove the axle fastener retainer and discard.
STEP 6
Use a torque wrench to tighten Zip-Torq to 200-250 lbs./ft. Rotate the hub one full rotation. Repeat this procedure two more times. Torque spec is the same for steer, drive and trailer applications.
A range of 200-250 ft./lbs. is acceptable.
For Applications Requiring Hubcaps
STEP 7
To complete installation, for steer applications, install the Defender ESP™ hub cap. For trailer applications, install Sentinel® or ESP plus hub cap.
For Defender hub cap, torque the hub cap bolts to 12-16 ft./lbs. using a star pattern sequence. For aluminum hub cap, torque to 12-16 ft./lbs.
If using non-driven axle with STEMCO 343-4119 hub cap, torque hub cap nut to 60-75 ft./lbs.
STEP 8
Add oil through hub side fill plug, hub cap side fill plug, or hub cap window. Add oil to the fill line on the hub cap window. See table below for oil sump capacities. Install drive axle shaft and gasket and torque axle flange nuts to between 100-150 ft./lbs.
STEP 9
If filling through hub side, fill port, torque to 20-25 ft./lbs.
For aluminum hub cap side, fill plug, torque to 5-9 ft./lbs.
For Defender hub cap side, fill plug, torque to 20 in./lbs.
On drive axle applications it is recommended to refill differential housing, and then jack the opposite side of the axle housing up 8-10 inches.
Hold this for one minute to allow lubricant to flow to hub, and repeat for other side. Put truck back on level ground and top off differential housing with oil.
STEP 10
If filling through the hub cap window, reinstall the plug.
If you would like more information on our STEMCO Trifecta, visit our product page.
To access our full library of Tech Tips, click here.
For in-depth articles covering industry news and trends, product spotlights, case studies, customer insights, and “thought leadership” topics from STEMCO professionals, visit The Wheelhouse Blog.


