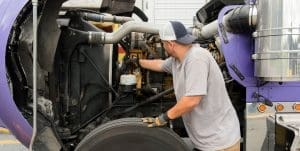
Tie rods are a crucial component of your semi truck’s steering system. In fact, tie rods connect the steering rack to the wheels themselves (via steering knuckle). If your vehicle’s tie rods wear out or fail completely, steering can become difficult or impossible altogether, which becomes a huge safety risk.
Bad Tie Rod Symptoms
If you’ve noticed any symptoms like your steering wheel feeling loose or unresponsive, uneven tire wear, or strange popping sounds or vibrations while driving, these could be signs that your tie rods are failing and need to be replaced. If this is the case, let’s talk about how to assemble and install a new STEMCO QwikTie Tie Rod.
QwikTie Tie Rod Assembly
QwikTie tie rods are mostly universal, as two part numbers cover 80% of straight tie rod assemblies. But how is this possible with so many different trucks? Due to the length of the ends, installing an entire assembly is much quicker than replacing individual components. QwikTie assemblies are built much stronger than original assemblies with their thicker cross-tube, making them much more durable. The tube also has a three-prong end that applies more even clamping pressure, making alignment easier and more secure.
So you’re ready to assemble your new QwikTie tie rod? That’s great, let’s get started!
What you will need:
Basic hand tools, torque wrench, tape measure, grease gun, PPE (safety glasses and gloves).
How long it will take:
Installation should take approximately 15 minutes, not including the time required for an alignment.
Things to remember:
The tie rod end assembly dictates the toe alignment angle; the toe is the most critical alignment angle related to tire wear. An alignment must be performed immediately after replacing the assembly.
Identifying Your Tie Rod Assembly Kit
When installing a tie rod assembly from STEMCO, you’ll first note two different assemblies available. The 12,000-lb assembly has a green protector cap, and the 16,000–20,000-lb assembly has a red protector. These kits will also expand from 57 ⅜ to 73 ⅞ inches to fit various applications. Also, you’ll want to note that the blue clamps (outer tie rod ends) should go on the curb side. This will ensure that the left/right tie rod ends are on the correct side in case an individual component needs to be replaced in the future.
- Determine the required application with the gauge that comes with the kit.
- Check the minor OD with the same gauge or a micrometer.
- Measure the old assembly from grease zerk to grease zerk to ensure the new assembly is as long as required.
- Thread out the new assembly, keeping it even on both sides.
- Put on PPE, including safety glasses and gloves.
- Remove the castle nut and green protector on either side using a proper tie rod removal tool.
- Thread the castle nut on both sides of the assembly on the vehicle with 250 ft/lbs of torque.
- Torque the clamps with 60 ft/lbs of torque.
- Install the new (cotter) keys on the castle nuts.
- Have an alignment performed to prevent excessive tire wear.
Check out this video for more detailed instructions on tie rod assembly. You can also download a PDF version of the installation instructions. If you have any questions or want to see a demonstration of the installation process, please consult your catalog or owner’s manual for more details, and if you have any questions, please get in touch with a STEMCO representative.