ELIMINACIÓN
- Utilice procedimientos establecidos para el desmontaje.
PREPARACIÓN DEL MUÑÓN DE DIRECCIÓN Y DEL EJE
- Limpie los ojos del husillo y del eje y séquelos.
- Elimine las rebabas de los orificios del husillo y los ojos del eje utilizando un pulidor de frenos o un dispositivo similar.
INSTALACIÓN DE LOS SELLOS DE LABIO DEL BUJE
- Tratar con cuidado. Los sellos de labio se dañan fácilmente.
- Utilizando un destornillador de buje o un dispositivo similar, introduzca los sellos en el orificio dejando el sello al ras con el lado del eje de cada orificio del husillo.
- Asegúrese de colocar el sello de modo que el labio apunte hacia el ojo del eje.
INSTRUCCIONES ESPECIALES PARA INSTALAR EL CONJUNTO DE BUJE ESPIRAL
- Usando el destornillador de bujes STEMCO® Kaiser™ diseñado específicamente para el kit, introduzca ambos bujes en los orificios.
COMPROBAR ANTES DEL MONTAJE
- Limpie los casquillos.
- Usando el perno rey para verificar el ajuste, primero inserte el pasador en cada casquillo individualmente y luego inserte el pasador en ambos casquillos; el perno rey debe deslizarse a través de ambos casquillos simultáneamente.
- Si el pasador pasa a través de los casquillos individualmente pero no simultáneamente, el eje se ha extendido y es posible que sea necesario reemplazarlo.
INSTALACIÓN DE COJINETES
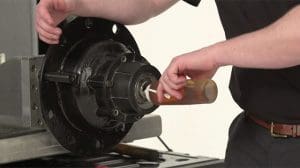
- Preempaque los rodamientos con grasa.
- Para conocer la orientación adecuada del rodamiento, consulte la Fig. 1.
- Coloque las cuñas necesarias debajo del orificio superior del eje.
- Coloque el perno rey a través del orificio superior del eje y a través de las cuñas necesarias, asegúrese de que la PARTE SUPERIOR del pasador esté paralela al eje para una alineación plana de bloqueo adecuada.
- Coloque el eje, las cuñas y el pasador en el eje, deje que el pasador caiga dentro del orificio del eje aproximadamente 2”.
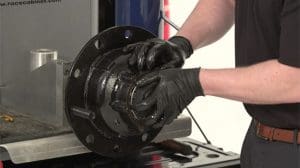
- Golpee el cojinete para colocarlo en su lugar. Un rodamiento correctamente ajustado requerirá un ligero ajuste sin dañar la caja del rodamiento.
- Si el rodamiento está demasiado apretado o demasiado flojo, ajuste la cantidad de cuñas que se utilizan.
- Cuando se trabaja en una aplicación donde el rodamiento tiene un hombro, el rodamiento debe instalarse antes de las cuñas.
INSTALACIÓN COMPLETA DEL PIN
- Una vez que el ajuste del rodamiento sea correcto, permita que el pasador se deslice dentro del buje inferior.
- Coloque las partes planas del pasador de bloqueo sobre el pasador de manera que queden alineadas con los orificios de bloqueo.
- Golpee los pasadores de bloqueo en su lugar, los pasadores de bloqueo con roscas aplican 25-30 pies-libras de torsión.
INSTALACIÓN DE LA PLACA EXTREMA O DEL TAPÓN EXTREMO
- Instale placas de extremo o tapones de extremo, utilizando el sello adecuado debajo de las placas.
- Instale el engrasador en la placa final o en el tapón final.
LUBRICADO
- Aplique grasa hasta que se pueda ver entre el eje y el eje.
COMPROBAR INSTALACIÓN
- Una vez engrasado, el eje debería girar fácilmente de un lado a otro.
- Debe haber muy poco movimiento hacia arriba y hacia abajo.
- Si la unidad parece floja o demasiado apretada, recomendamos llamar a nuestro servicio técnico para obtener ayuda.


