Los rodamientos son la base del transporte por carretera comercial. Una calidad inferior puede costar mucho más que el dinero que ahorra. Afortunadamente, STEMCO ha sido reconocido durante mucho tiempo dentro de la industria de camiones pesados como un proveedor de calidad de productos de extremo de rueda de primera calidad. Nuestros rodamientos de alta resistencia ofrecen una calidad y confiabilidad inigualables y son parte de nuestra promesa de hacer las carreteras más seguras.
El propósito de estos recursos viales es informar a nuestros clientes sobre los métodos adecuados de extracción e instalación de los rodamientos de servicio pesado STEMCO. Haremos referencia a los siguientes archivos PDF de STEMCO:
Extracción de cojinetes
PASO 1
Retire el conjunto de cubo/rueda del vehículo de acuerdo con las prácticas recomendadas.
PASO 2
Retire los conos de los cojinetes internos y externos y déjelos a un lado para su inspección.
PASO 3
Utilizando un punzón de acero dulce o un destornillador de copa, extraiga con cuidado las copas de los cojinetes.
- Se debe tener precaución al accionar las copas de los rodamientos, ya que los punzones y otras herramientas pueden dañar los rodamientos.
- Las derivas pueden dañar los orificios de los cojinetes de las mazas. Tenga cuidado de no rayar los orificios al retirar las copas, especialmente cuando utilice cubos de aluminio.
Inspección de los cojinetes
PASO 1
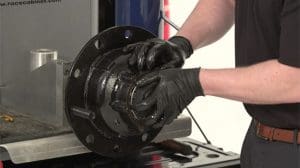
Inspeccione los orificios y hombros de los cojinetes de la maza en busca de daños. Los orificios deben ser lisos y libres de rayas, rebabas, indicios de giro de la copa u otras formas de daño. Elimine las rebabas o áreas elevadas con tela de esmeril, una lima u otra herramienta adecuada.
PASO 2
Mida el orificio de la copa del cojinete y compárelo con las especificaciones del fabricante.
PASO 3
Inspeccione las copas y los conos de los cojinetes en busca de daños. Los rodamientos deben estar libres de astillas, contaminación y signos de desgaste excesivo o calor excesivo. Consulte la literatura sobre análisis de daños en los rodamientos para identificar posibles problemas en los rodamientos.
ETAPA 4
Inspeccione los muñones de los cojinetes del eje del eje en busca de signos de daño o desgaste excesivo. Elimine las áreas elevadas o rebabas con tela de esmeril, una lima u otra herramienta adecuada.
PASO 5
Los diarios deben medirse y compararse con las especificaciones del fabricante.
Instalación de rodamientos
PASO 1
Limpie minuciosamente las copas y los conos de los cojinetes antes de la instalación.
- No utilice aire comprimido para hacer girar los rodillos del cojinete, ya que pueden producirse lesiones si la jaula no retiene los rodillos.
PASO 2
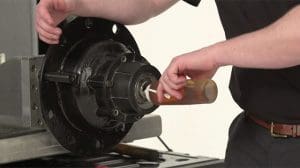
Cubra ligeramente el exterior de las copas de los cojinetes con aceite.
PASO 3
Con un destornillador de copa, introduzca con cuidado las copas de los cojinetes en los orificios del cojinete de la maza. Ser
asegúrese de impulsar la copa firmemente contra el hombro de la copa en el cubo.
- Si no se dispone de un impulsor de copa, se puede utilizar un punzón de acero dulce para instalar las copas de rodamiento.
- Se debe tener precaución al accionar las copas de los rodamientos, ya que los punzones y otras herramientas pueden dañar los rodamientos.
- NUNCA utilice un cono de rodamiento para impulsar una copa de rodamiento. Esto puede dañar los rodamientos y provocar fallas prematuras.
ETAPA 4
Utilice una galga de espesores para comprobar si hay espacios entre la copa y el hombro.
PASO 5
Inspeccione las copas de los cojinetes para asegurarse de que no se hayan producido daños durante la instalación.
PASO 6
Lubrique los conos de los cojinetes según las prácticas recomendadas y continúe con la instalación del conjunto de ruedas.
Si desea obtener más información sobre los rodamientos de servicio pesado STEMCO, visite nuestro página del producto.
Para acceder a nuestra biblioteca completa de recursos viales, haga clic aquí.
Para artículos detallados que cubren noticias y tendencias de la industria, productos destacados, estudios de casos, opiniones de clientes y temas de "liderazgo intelectual" de profesionales de STEMCO, visite El blog de la timonera.


