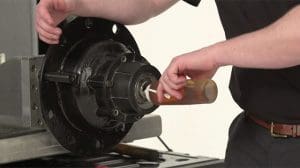
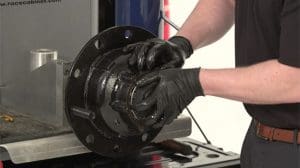
Les produits STEMCO Vehicle Technology (SVT™) utilisent des technologies intelligentes pour prendre des décisions basées sur des données qui simplifient les procédures de maintenance et améliorent la sécurité globale de la flotte. DataTrac Pro est un compteur kilométrique avancé qui s'appuie sur la gravité terrestre pour compter les tours de roue. L'unité DataTrac Pro surveille son orientation par rapport à l'attraction gravitationnelle de la Terre et utilise cette référence pour reconnaître et compter les révolutions.
Le but de cette astuce technique est d'informer les clients des méthodes d'installation appropriées pour notre DataTrac Pro. Nous ferons référence aux PDF STEMCO suivants :
Programmation de l'unité
Distribution ou utilisateur final avec un programmeur
L'unité est expédiée de l'usine avec une valeur Revs/Mile de zéro. Les tirets (- – – -) sur l'écran indiquent que l'appareil n'a PAS été programmé. Il DOIT être programmé avant d'être installé sur un bout de roue (le distributeur DataTrac Pro devrait avoir un programmateur ou peut vous vendre un programmateur).
Le programmeur peut définir les DataTrac PRO :
- Révolutions/mile (ou par km) – Utilisez le catalogue de STEMCO pour déterminer les révolutions/mile pour chaque marque/modèle de pneu.
- Unité de mesure de distance – Miles ou Km (miles à vie uniquement ou incluant les miles de voyage)
- Kilométrage prédéfini – Réglez le kilométrage pour qu'il corresponde au kilométrage actuel du véhicule sur lequel l'unité sera montée.
Une fois la programmation terminée (comme indiqué sur l'écran du programmateur), soulevez immédiatement le DataTrac PRO et confirmez que l'écran affiche les révolutions de pneus correctes (affichées comme « REV### » sur l'écran). Sinon, répétez la programmation.
Le DataTrac Pro peut être programmé/reprogrammé autant de fois que vous le souhaitez jusqu'à ce qu'il y ait environ 2 miles sur l'unité.
Installation de l'unité
Installez l'unité DataTrac PRO à l'aide du support et du matériel STEMCO appropriés. L'écrou fourni avec l'unité est un écrou de blocage et ne doit pas être serré à plus de 15 pi-lb.
Lecture de l'affichage
L'écran s'allumera lorsque le véhicule est à l'arrêt. Les chiffres s'orienteront automatiquement pour lire verticalement. Ceci est également indiqué par l'affichage d'icônes, par exemple mile, km, acre. La lecture du kilométrage est toujours dans le même sens que l'icône.
Afin d'économiser de l'énergie, l'écran s'éteint à chaque fois qu'une vibration est détectée. Cela signifie que l'écran sera éteint pendant que le véhicule roule. Dès que toute vibration ou mouvement s'arrête, l'écran se réactive dans environ 5 secondes.
Modes d'affichage
L'unité DataTrac Pro est équipée de trois modes d'affichage : LIFE et TRIP (si programmé) et REV. Pour basculer l'affichage entre les modes LIFE, TRIP et REV, utilisez la paume de votre main pour couvrir la bulle ronde sur la face de l'appareil pendant au moins 1 seconde, puis découvrez-la.
Si l'appareil est exposé au soleil, il faudra peut-être recouvrir la bulle avec votre paume pour empêcher davantage de lumière d'atteindre le capteur. Le mode TRIP s'affiche avec une résolution en dixièmes et est indiqué par l'affichage de l'icône TRIP (uniquement si l'unité est programmée pour TRIP).
Pour réinitialiser l'affichage TRIP, basculez rapidement entre les modes LIFE, TRIP et REV 5 fois. Notez que l’unité ne peut pas basculer plus rapidement que toutes les 1,5 secondes.
Pour visualiser les révolutions de l'unité, répétez simplement le processus utilisé pour visualiser le déclenchement, puis un écran indiquant (REV XXX) apparaîtra. Le XXX est le nombre de tours par km ou par mile pour lequel l'unité est programmée. Sur les unités sans TRIP, il n'y a que deux écrans, tous les autres ont trois écrans (LIFE, TRIP et REV).
Comme pour le mode TRIP, l'appareil reviendra au kilométrage après 10 secondes s'il reste dans l'écran des tours.
Si vous souhaitez plus d'informations sur les roulements robustes STEMCO, visitez notre fiche produit.
Pour accéder à notre bibliothèque complète de ressources routières, Cliquez ici.
Pour des articles approfondis couvrant l'actualité et les tendances du secteur, les produits phares, les études de cas, les informations sur les clients et les sujets de « leadership éclairé » rédigés par des professionnels de STEMCO, visitez Le blog de la timonerie.


