STEMCO fournit à l'industrie du camionnage des joints de roue fiables depuis plus de 60 ans. Tout au long de notre histoire, nous avons reconnu le besoin de joints plus résistants et plus durables qui répondent aux attentes de performance de chaque flotte, le tout dans le but de maximiser les performances et la valeur.
Par exemple, notre joint de moyeu Guardian HP intègre les meilleures fonctionnalités pour prévenir les principales causes de dégradation de la durée de vie du joint : la pénétration de contamination et la génération de chaleur.
Le but de cette astuce technique est d'informer les clients des méthodes d'installation appropriées pour nos joints de moyeu Guardian et Guardian HP. Nous ferons référence aux PDF STEMCO suivants :
- Instructions d'installation du joint de moyeu Guardian HP
- Joints de roue Guardian HP – Pratiques d'installation appropriées
- Catalogue STEMCO-TQM
ÉTAPE 1
Retirez toutes les bavures de l'alésage du moyeu et de la broche. Nettoyez soigneusement toute la cavité de la roue. Appliquez une fine couche de mastic n°2 sur le diamètre extérieur de l'épaulement de la broche. Placez l'ensemble de joint sur la broche de manière à ce que les mots « Côté roulement à huile » soient exposés à l'huile.
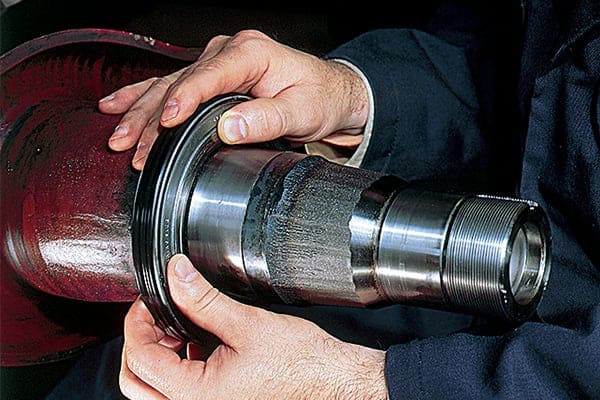
Attention : N'installez pas le joint dans l'alésage du moyeu.
ÉTAPE 2
À l'aide de l'outil d'essieu universel STEMCO recommandé, enfoncez l'ensemble de joint jusqu'à ce que l'outil touche l'épaulement.
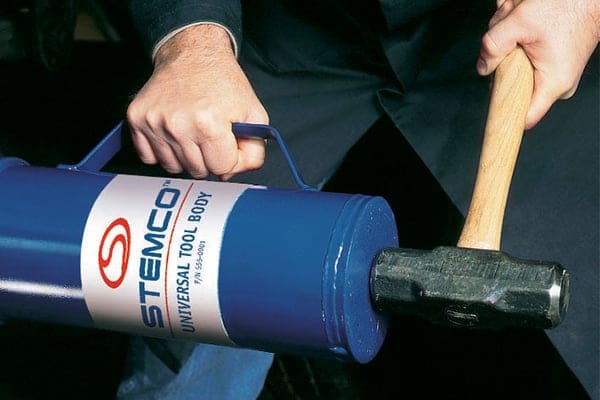
Assurez-vous que la bague affleure l'épaulement de l'essieu. Assurez-vous que le joint entre entièrement en contact avec la bride de la bague d'usure. Essuyez tout excès de mastic.
ÉTAPE 3
Trempez le roulement intérieur dans l'huile et placez-le sur la broche. Le diamètre extérieur du joint doit être recouvert d'une fine couche de lubrifiant. Lorsque vous utilisez de la graisse, pré-emballez le roulement intérieur avant de le placer dans le moyeu.
ÉTAPE 4
Avec la roue montée sur un chariot à roue, poussez soigneusement la roue sur l'axe jusqu'à ce qu'elle entre en contact avec le joint.

Trempez le roulement extérieur dans l'huile et placez-le sur la broche. Lorsque vous utilisez de la graisse, pré-emballez le roulement extérieur avant de le placer dans le moyeu. Ensuite, serrez à la main l’écrou de la broche intérieure et retirez le chariot de roue.
ÉTAPE 5
Serrez l'écrou intérieur à 200 pi/lb. Faites tourner la roue plusieurs fois, puis desserrez l'écrou d'un tour complet.
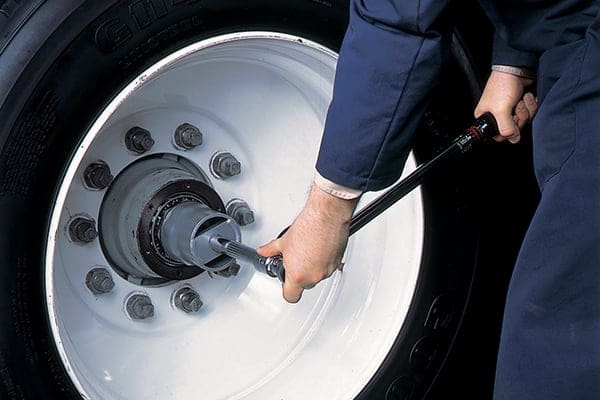
Effectuez le réglage final des roulements conformément à la procédure de réglage des roulements recommandée par TMC. Installez la fixation d'essieu appropriée.
ÉTAPE 6
Installez le capuchon de moyeu avec un nouveau joint et remplissez la cavité de lubrifiant jusqu'au niveau approprié. Sur les essieux moteurs, assurez-vous que le niveau d'huile du différentiel est suffisamment élevé (niveau recommandé par le fabricant) pour garantir l'écoulement de l'huile à travers le tube jusqu'aux roues. Il est recommandé de soulever un côté puis l'autre jusqu'à ce que l'écoulement commence. Assurez-vous que le bouchon de reniflard est dégagé. Revérifiez les bouvillons et les remorques pour garantir des niveaux de remplissage appropriés.
Si vous souhaitez plus d'informations sur Guardian et Guardian HP, visitez notre fiche produit.
Pour accéder à notre bibliothèque complète de conseils techniques, Cliquez ici.
Pour des articles approfondis couvrant l'actualité et les tendances du secteur, les produits phares, les études de cas, les informations sur les clients et les sujets de « leadership éclairé » rédigés par des professionnels de STEMCO, visitez Le blog de la timonerie.


